
This University project was an exercise in groupwork and scale modelmaking. The aim was to create a scale model of either a piece of landscape or a building, that could be used for a theoretical film production. The group that I was a part off chose to create a scale model shot pf the fictitious sub-maritime city "Rapture" from the game Bioshock™.

The first part of the project was used to research the architectural style of Rapture. Ofcourse the city SCREAMS art deco. According to author Trevor Yorke, art deco was a style that was developed between the 1920s and 1930s and was developed to reflect the optimism that followed the end of World War 1. Art deco was focusing on streamlined shapes, straight lines, and bold geometric patterns. This was to emphasize the progress of modern technology.
A lot of inspiration for art deco came from native American, Egyptian and antient Greek culture. This meant a lot of repeating geometric patterns, sun rays and stair stepping. A good example for these characteristics was the Chrysler Building. Its simple monolithic body, and decorative top were ideas that were implemented in various shapes and facets in other art deco skyscrapers.
For Rapture there were a few aspects that were important to highlight, such as neon signs, billboards and large, arched glass surfaces. The billboards and neon signs helped to manifest the capitalist and consumerist culture of rapture. Whilst the large glass surfaces gave the city the sub-maritime appearance.


Next step was designing. The buildings were modelled in SketchUp. This software was chosen because it was easy to learn and it still is in industry standard in a lot of sections within the art department.


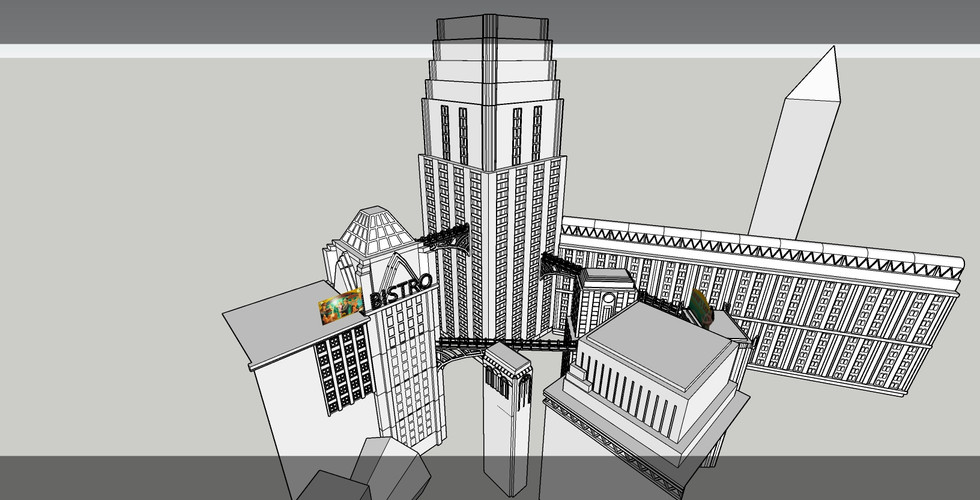


We made sure to only produce all the faces that were seen by the camera. Anything else would be a waste of effort and time.
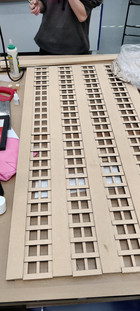
After the 3D model was finished, every building was deconstructed into flats that could be laser cut into MDF. Vector files were generated and the buildings were cut.


The buildings were assembled using screws, CA glue and woodglue.


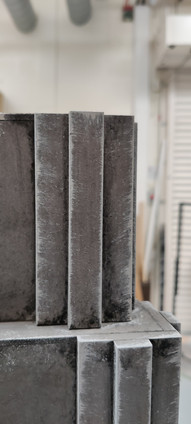
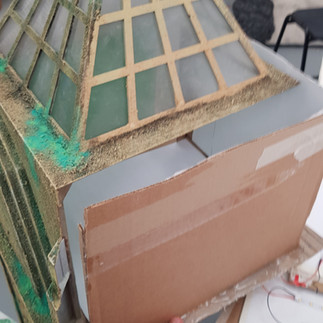
The last step for the buildings was painting and weathering. The basecoat was applied with an automotive spray gun. For more detailed buildings a texture was added with sand and glue before the base was applied.


Next was shading and weathering. this was done with a mixture of airbrushing, drybrushing, dal oil washes and pastel powdering.


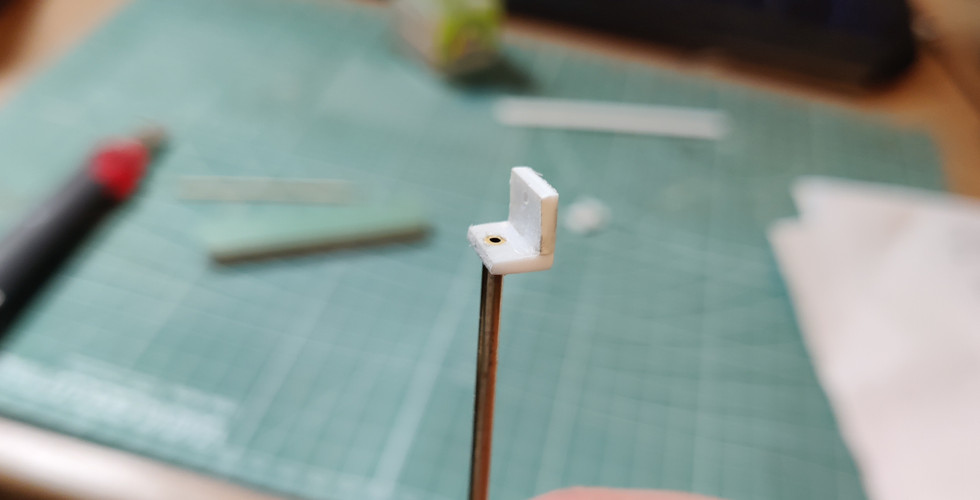
The billboards were constructed using a sheet of styrene and 3D printed scaffolding. The lights were made with bent brass pipes and a styrene bracket. It the end of the bracket a tiny SMD LED was glued. The wires were fed through the brass pipes to hide them from the camera. The graphic was printed onto glossy paper and glued to the styrene sheet using double-sided tape.


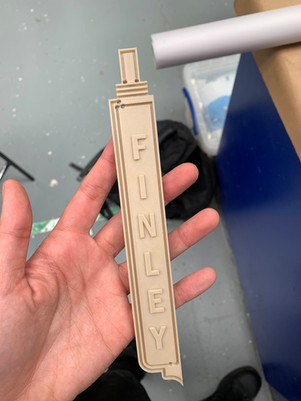
The "Finley" neon sign was 3D modeled in sketchup and 3D printed. To create the actual neon lights, LED filaments were fit into channels that were designed into the 3D print.


Several other methods were used to create other noen signs. Some were 3D printed and filled with silicone to defuse the light, others were lightboxes that had clear plastic letters that were laser cut.


The lights for the main buildings were LED strips that were glues onto cardboard walls. There walls were then taped to the back of the buildings.


The last act was to film the model. It was filmed using a motion controlled camera slider. This slider filmed the model in several passes that could be composed together to create the final image.

Comments